Bathed in Brick

With the 2 upstairs bathrooms finished and the old basement bathroom still intact, we had one more bathroom to contend with.  The main floor bathroom is small and serves as a powder room but actually was built to be another full bath.

We wanted to save what we could which included the original tile floors and the pocket door as well as a large picture window.  Everything else had been gutted from the room so we were able to get creative when putting it back together.

I chose to carry the brick from the kitchen into this room to add flare and make it feel as though it was an existing part of the old house.  To get started, we installed the shower base and then installed concrete board to not only the shower walls but the rest of the room.   Instead of drywall, we bricked the entire room floor to ceiling and also bricked inside the shower.

To make sure it was moisture proof, we put two coats of masonry sealer on the bricks and grout. This darkened the brick color slightly and added a wet-look sheen to the walls.  The install was like putting on tile and will function just like tile would when the shower actually gets used by guests.

img_2933

Because of the shape of the bathroom and the placement of the window, we were limited on other items that could go in this bathroom so we kept it simple with a small pedestal sink.  Since the window is above the sink, we mounted a medicine cabinet above the toilet for a needed mirror and storage.

Even with the small space, I love how much of an impact this room makes because of the brick. It is truly a one-of -a-kind space and makes a huge statement for guests when they come over.

nckr0227

img_3905img_3925img_3924

“Slow” Season or “Serious” Season?

As the days get shorter and temperatures drop, many sellers ask if they should wait to list their home instead of putting it on the market now.  For those looking to sell their home now, there’s good news:

According to a Huffington post article and Redfin, now is the BEST time to listing your home!

“Anytime between December and May is an ideal time to list your home — and February is the hands-down the best month. The company’s analysis of nationwide listings from 2014 showed that 74 percent of homes listed in February sold within 90 days, and 13 percent of them sold for more than the list price. (Compare that to September, when 61 percent of homes sold within 90 days and October, when just five percent sold above list price).

In short, “shoppers in January and February are motivated,” says Christin Camacho, a Redfin spokesperson. “They’re looking in winter because they need to move, not because they’re just looking for fun.” And if people are going to brave the cold to househunt during winter, then they’re going to make their effort worthwhile.”

Masterminding the Master Bathroom

The master bathroom started as a completely gutted space.  The floors were torn up in spots and unfortunately not salvageable.    The tiled walls had also been torn out as well as the shower, vanity and toilet.

With such an unfinished space, I was able to truly customize it to be exactly what I wanted.   I knew I wanted a large walk-in shower, an antique classic look, and plenty of storage.  Unfortunately, this also meant it had to get worse before it got better…  The place had to be completely demoed before these things could be put back in.  What made it even harder was that we did not have any lighting/electrical upstairs at that time!

img_1730

“Dark Demo Work”

After the place was cleaned up and electrical was run, we were were really able to get a layout set.  (With plenty of help/supervision from the dogs, of course)

We were able to use space that had originally been a 2nd hall closet to add more space to the bathroom in order to create the walk-in shower.  That freed the space that used to house the bathtub to become the location for the dual vanity.  We moved the location of the toilet to the old linen closet and made space for a new linen closet next to the new vanity.

img_2249

Future master shower

img_2251

Future “Water Closet”

img_2245

Shot of Crusoe supervising the vanity and linen closet design

img_2231

Vanity plumbing

When choosing finishes, I knew I wanted the space to feel like it could have been there since 1935 even though it was a modern layout.  I chose to use herringbone marble for the floors and 12×12 tile for the shower walls to create timelessness.  To make the shower feel more modern, we added dual overhead showerheads and 2 built-in storage shelves.

We then installed an old dresser as a vanity with the plumbing and sinks retrofitted to maximize drawer usage.  Instead of being underneath the sink, the water and drain lines are actually located in the wall behind the vanity.  Access panels were installed in the master closet on the adjoining wall.  A piece of glass was put on the top of the vanity to keep water from damaging the piece.  We used clawfoot tub faucets for the sink faucets and mounted them from the wall.

12439358_10101551109760601_3349176808817664838_n12986966_10101543831396501_2617629802699370227_n13103515_10101559511373701_1942764683545217654_n

We built a new linen closet in the corner for extra storage and used old cabinet doors that remained from the kitchen demo to carry out the historic look.

We love that the end product looks both modern and antique while being completely unique.  It is truly a one-of-a-kind master bathroom that utilizes every inch of space offered in an old house.

Swtichback Kitchen Design

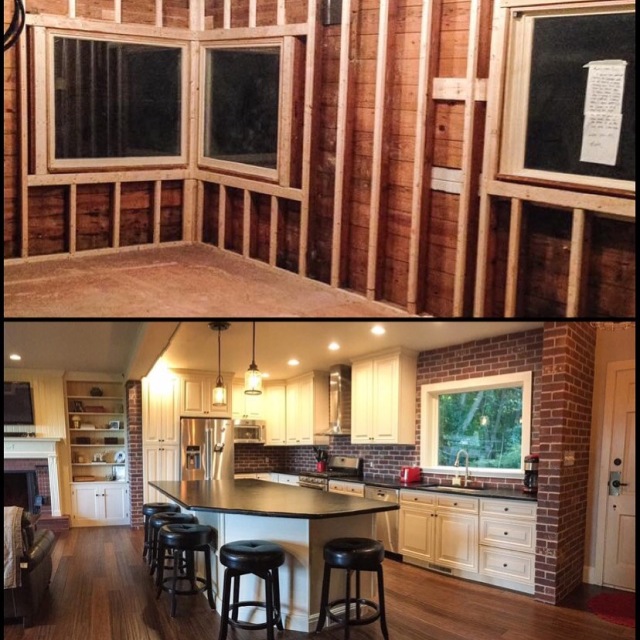
With the beam in place and the brick up as a backsplash, it was time for the fun task of designing the kitchen here at Switchback Manor!

PEORIA1157193O

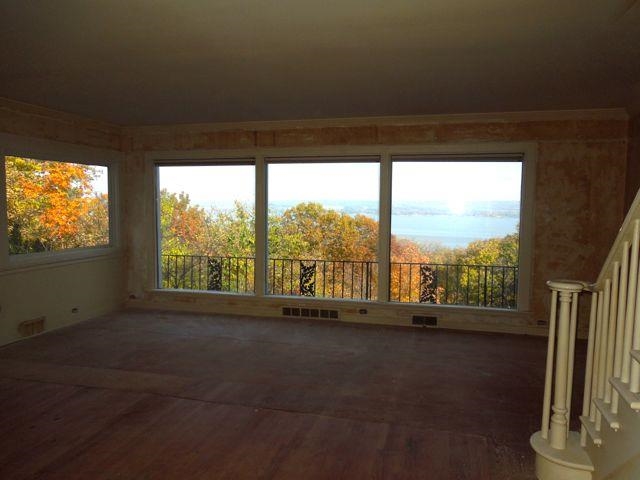
Kitchen when we bought the house

We wanted the design to be in keeping with the old feel of the home while still having the modern amenities of a new kitchen.

12744029_10101480101142441_432197277921471329_n

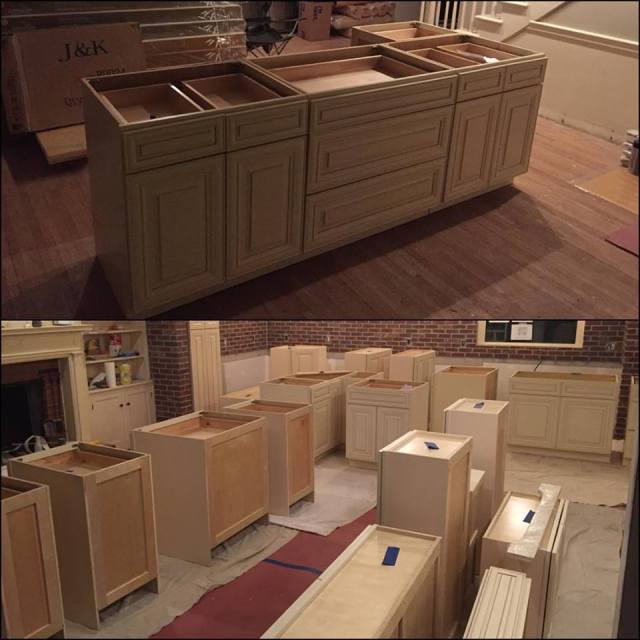
We first installed the flooring to ensure that the flooring would be under all of our cabinetry in case we ever changed the layout in the future.  After that, it came time to pick out cabinets and countertops.

12744419_10101485726778621_2114624616031415078_n

We chose ivory cabinets to carry the color of the fireplace built-ins and trim from the rest of the house and make the cabinets feel more original than brand new.  One thing I made sure to do was to have the cabinets extend to the ceiling to ensure both authenticity and as much storage as possible.  I am not a fan of soffits and since they are a relatively recent kitchen design, they did not belong in the house.

12791082_10101503188624941_998557649448910478_n

For our layout, we worked with our existing, opened galley kitchen by adding a large centrally located island separating it from the open family room.  We then also added a dry bar/office nook behind the family room to create a cohesive feel and add yet more storage.

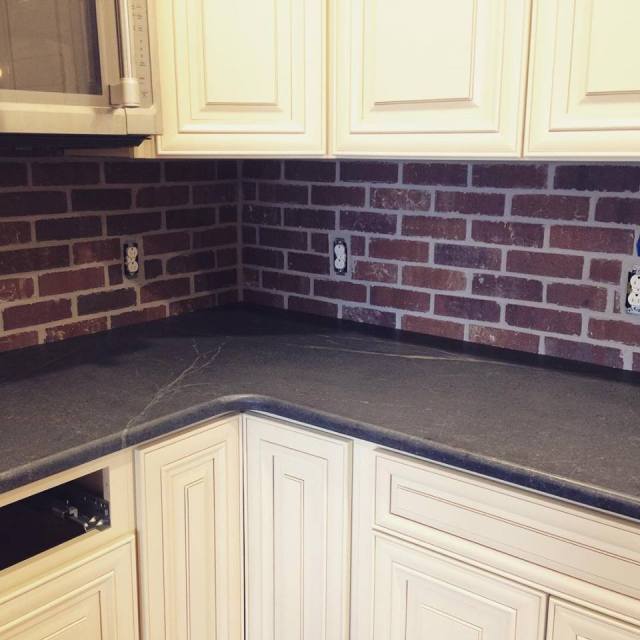
For countertops, we chose soapstone.  This would not only have been a stone that was used in the early 1900’s, but it is a great countertop option for multiple reasons.  It is non-porous so unlike granite, it does not require yearly sealing.  Instead you can oil the surface to bring out the natural veining.  The more you oil it the darker it gets.  The surface can also stand up to high heat.

12809795_10101504689966241_5342736371981647132_n12805692_10101505189884401_2983314336602975529_n

For appliances, we chose stainless to help modernize the space.  I love how the old works so well with the new in this space.

img_3669

FINALLY! A Bathroom for My Clawfoot!


One of the more disappointing things about buying a gutted old home has been that the bathrooms have very few original features remaining.  The tubs and wall tiling, toilets and sinks were all gone, and the only thing remaining of the old bathrooms were some beat up plaster walls and the flooring.  The flooring in one of the bathrooms was not salvageable but the upstairs bathroom for the 2 guest bedrooms had great green tiles we really wanted to save.  There was a large hole from the old tub that was an irregular size but we came up with a great idea in order to keep the old tile.

1916650_10101507315434781_2440995864892787104_n

We built a pedestal and got a cast off 100 year old clawfoot tub to put on top!

This not only covers the area of tile we could not fix but better showcases the antique tub.  Our first step was drywalling the space with mold resistance drywall and then installed concrete board on the pedestal and the walls surrounding it.

It was then time to get to work subway tiling the area.  I chose a white beveled subway tile to add a modern take on the old style.

1660862_10101511951064941_6529441623159753630_n

I then added a stripe of black to tie in the vanity we planned to add and a glass color to tie in the original sea glass floor color.

After it set, the tile was grouted with unsanded gray grout and we set to work painting the bathroom.  After paint, the tub as well as the vanity and toilet could be installed.  For the vanity, we used a remnant of our kitchen counter top which is soapstone.  It will can be oiled and will darken with time.

12795267_10101514727201541_5009887208099425503_n

This became our first fully functional bathroom at Switchback Manor!


img_3892img_3896img_3902img_3929img_3934


Shiplap Style: A Little Fixerupper Flare at Switchback Manor

After finishing wallpaper removal and plaster work, there were still some areas of the house that had plaster that was in really bad shape.  The worst offender was the upstairs hallway.  Not only was chipped paint falling off the walls but the plaster itself was crumbling.  This was due mostly to a moisture (and later mold) problem that happened as the home sat vacant before we bought it.  With the humidity too high, the plaster was basically ruined.  With a new HVAC system and duct work in place, we no longer had to worry about mold growing but we still had to deal with the walls.

My husband and I are huge fans of Chip and Joanna Gaines from “The Fixerupper”  and knew we had the perfect opportunity to put Joanna’s shiplap look into our home.  We bought 1 x 10 pine boards from Menards and started at the bottom of each wall using a nail gun for a rough finish.  We used cabinet shims as spacers to create a small space between each board .  The process was actually pretty quick and we liked it so much that we did one of the more damaged walls in our master bedroom as well!

12814175_10101508400400501_6488296325539011049_n1467283_10101514726208531_3824877049293720888_n

Not only did it take care of our plaster issues, but it added a visual interest to an otherwise boring hallway.  We then added crown molding to dress the shiplap up and painted everything a glossy antique white that matches the trim throughout the house.  Rather than rolling the paint on for a perfect finish, we used a brush to keep the character of the wood.  The result is casual and homey without feeling too “country.”

img_3888

We love the effect so much that we plan to do a shiplap wall in the basement when we finish that as well!

Flooring: Eco Friendly and Attractive

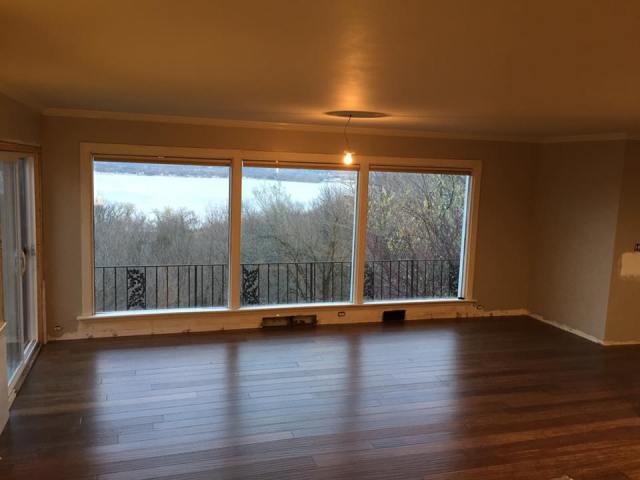
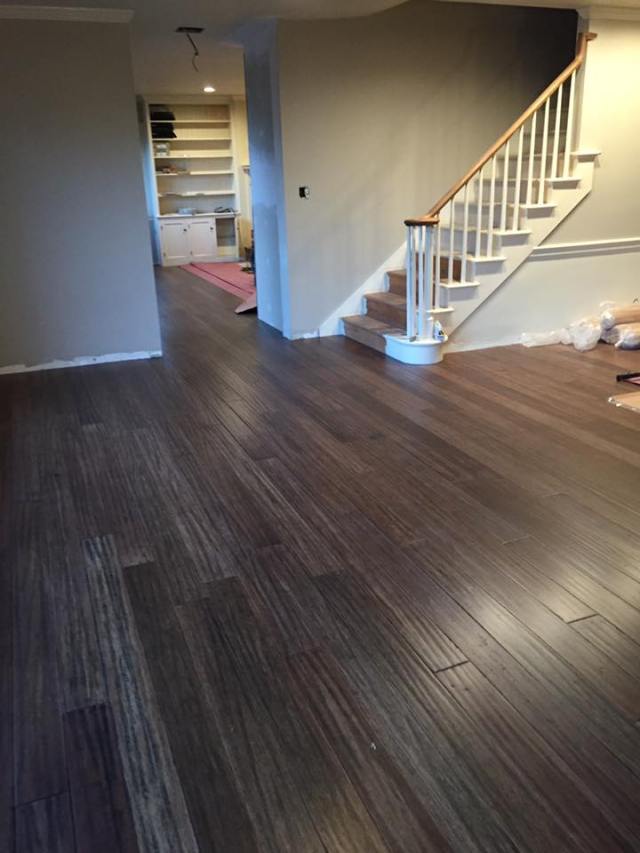
It is looking much more finished here at Switchback manor with the flooring down!

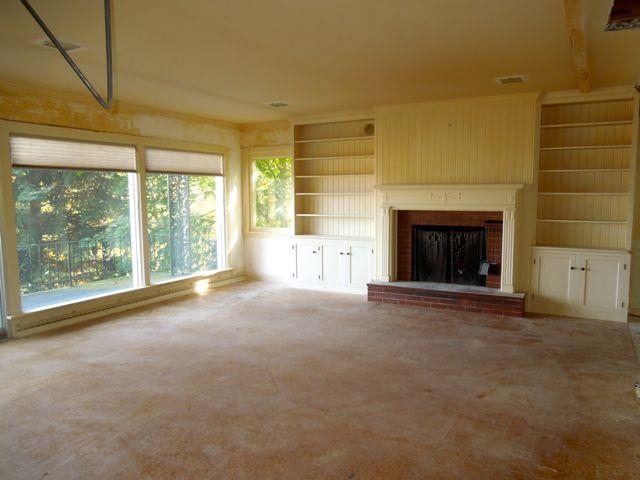
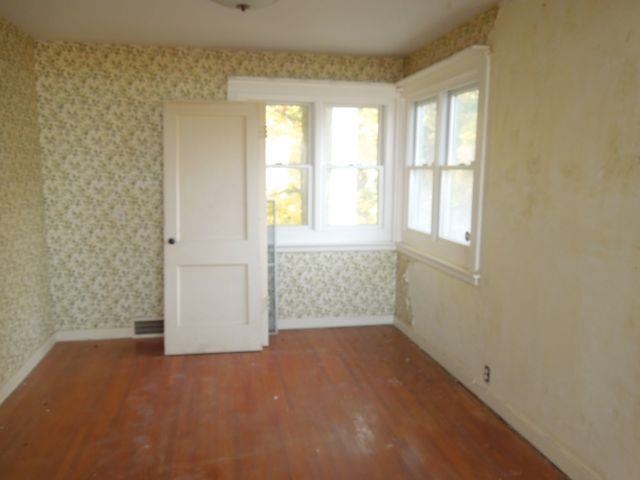
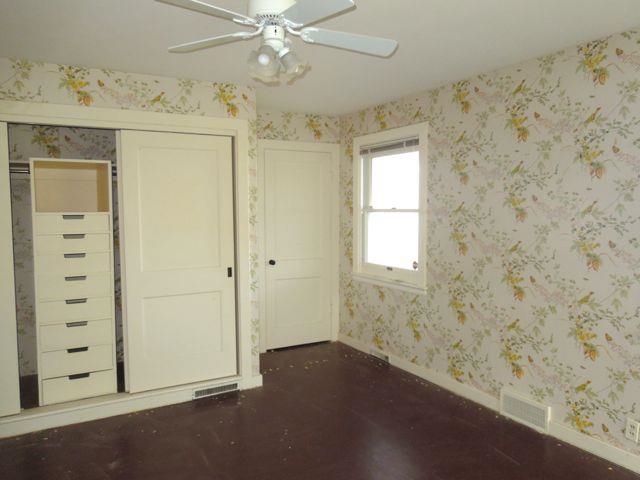
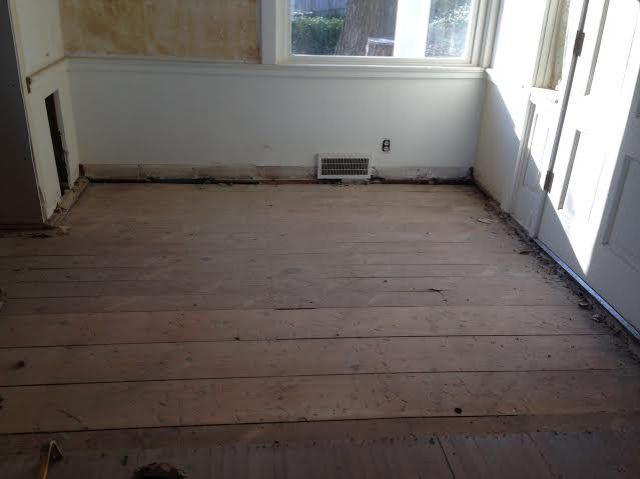
When we bought the house, most of the house was demo’d down to the sub floor.  There were a few areas that had original hardwood remaining but they torn up in parts and were also level with other added subflooring in other parts.  It would have been more work to try to save them and would have resulted in a choppy feel to the house.

PEORIA1157193G

Formal living room

PEORIA1157193E

dining area

PEORIA1157193I

Family room

PEORIA1157193O

Kitchen

PEORIA1157193P

master bedroom

PEORIA1157193S

4th bedroom turned closet

PEORIA1157193Q

2nd bedroom

Instead, we chose an option that would not have been around in the 1930’s but has a distressed finish to blend with our “new old home.”  We picked bamboo which is actually harder than oak when chemically pressed and will be great for a home with pets.  It is also eco friendly as bamboo grows quite fast.

12744029_10101480101142441_432197277921471329_n

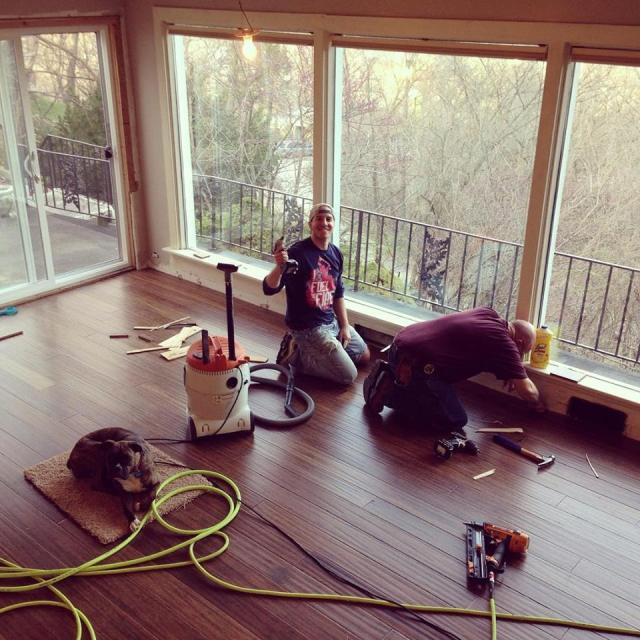
The installation process was the same as for tongue and groove wood flooring:  after laying out a thin underlayment for sound, the planks were fitted to each other and nailed using a special nail gun designed for flooring.

12932964_10101537186737451_2227626798709406707_n

Family room Hall

12495068_10101537186682561_6675936431297060966_n

943860_10101537065210991_3203355421084034125_n

The boys hard at work

12512410_10101537186852221_2997454110819378949_n

Living/Dining room

12928353_10101537186932061_6763451862726308201_n (1)

Crusoe and Piper supervising

12963802_10101537186892141_8302985734461151271_n

12928184_10101537186986951_5767247971051362818_n

Upstairs Hall

12924337_10101537186822281_2118416071321939702_n

Entrywall (formerly slate tile)

10152054_10101518530080541_2326005201791834888_n

Master Bedroom

12923156_10101537187016891_862742779492579824_n

Bedroom 3

The best part? Because of the distressed, darkened finish, if it does get scratched will can simply use a stain pen to darken the area and it will blend with the existing distressed marks!

Overall, I am so happy with the dark flooring next to the pale gray walls.  Next step..trim!

Hitting the Bricks at Switchback Manor

We are finally getting to the really fun “designy” part of our rehab project at the house we have nicknamed Switchback Manor.  One of my personal goals with the project was to use materials and designs that would have mostly been around in 1935 when the house was built while still keeping the place functional for a modern lifestyle.  I love the mix of old and new; embracing the past while living in the present.   I wanted to show how an old house could feel like both a piece of history and a functional up-to-date home.

Materials that would have been around in 1935 were great quality and include marble, soapstone, old growth wood, and brick.  A lot of the original finishes no longer exist in the house after several 1960’s-1970’s remodels so we did need to use mainly new products to create the look.

Since our kitchen is now open to our family room with the install of the support beam, we decided it would be really fun to carry the original fire place brick through to the kitchen.  We are going to brick the supports for each side of the beam and have a brick backsplash behind our cabinets.

b3708335-70dc-4237-aabe-9a5a2ddadb28

It was difficult to find something to match the old 1930’s brick  from the fireplace but we eventually found a close match in one of the selections from Brickweb.  The product is not cheap but is really great quality.  They are real kiln fired clay bricks sliced thin to use on walls, and they come in pre-set sheets that make install a little easier (it’s still a long process!).

We used a tile mastic instead of mortar to adhere the sheets to the wall and set each piece cutting space for outlets and leaving room for cabinets.  We then bricked the wood supports to the beam and the room really started to come together.  The most labor intensive part of the process was definitely the grouting as the joints are large and the brick is porous.  Using vinegar in the water to clean the grout haze off really helped the clean-up go faster.

Overall we are so happy with the way it turned out and are excited to see it when the project is complete.  The brick really helped to tie in the old and the new of this house. We have even decided to use the product later in a different room of the house…

f3bc6fa5-b758-453f-b94a-f2e02b3d7f24

The next step will be sheeting the beam and painting it to match the rest of the woodwork in the house while getting the flooring done in preparation for cabinets!

Below is a video with a great tutorial about how to install Brickweb:


Great Post on Making Millions in Real Estate!

Sometimes a team can accomplish far more than a group of lone individuals. For example, cyclists in the Tour de France take turns riding at the front of their group, decreasing the wind for those behind them. Wolves hunt in packs to take down animals 20 times their size. And for those of us who were children of the ’90s, we all rememberDucks Fly Together.

This brings up another team that can accomplish amazing things — not a team of people, but a team of benefits which, when combined, can help you achieve your greatest financial goals. Specifically, I want to talk about real estate.

I’m a real estate investor, and I firmly believe that real estate is the best traditional investment on Planet Earth today. However, just because you buy a piece of real estate doesn’t mean you’re going to make money.

As I explain in The Book on Rental Property Investing, big wealth is built through real estate investing by capitalizing on something I call “the four wealth generators of real estate.” Alone, each of these benefits can help you make more money, but together they’ll make you rich.

***Hey, you! Yes, you! I want to invite you to this week’s BiggerPockets Webinar, The Top 10 Mistakes Real Estate Investors Make (and How to Avoid Them). We’ll be talking about some common mistakes made by both new and experienced investors — and how you can beat the odds and avoid them! Hope you can make it! And now back to the post!***
evaluate-property

Download Your FREE Rental Application Form!

It may seem like a small thing, but having a solid rental application is the first step in finding great tenants. Since BiggerPockets is all about helping you succeed in real estate investing, we’ve put together a complimentary Rental Application for you to use. Download it today and go find some great tenants!

Click Here For Your Free Rental Application

1. Cash flow

Cash flow is the extra profit left over after all of the expenses have been paid on a property. For example, if my rental property produced $2,000 in income and my expenses came to $1,700, my cash flow would be $300 that month.

Related: One Simple Habit the Vast Majority of Wealthy People Practice Every Single Day

Now, I know a lot of you are saying, “Three hundred dollars is not going to make me a millionaire.”

Probably not. But remember, we are just talking about one of the wealth generators. There are still three more to go!

Additionally, that $300 might be from just one property. If I owned ten similar units with the same cash flow, that’s $3,000 per month. If I owned 100 units, that’s $30,000 per month. This cash flow can go a long way toward helping you quit your job — or helping you save for a future big purchase, or retire wealthier.

2. Appreciation

When I talk about appreciation, I am not referring to how much I like you (though I do appreciate you!). I’m referring to the natural rise in value that real estate experiences. For example, if you purchased a property for $200,000 ten years ago, and today that property is worth $300,000, the appreciation made you $100,000 richer!

Of course, appreciation doesn’t cause values to increase every year (consider 2007!). However, historically, real estate prices have appreciated over the long term. So, again, appreciation alone is not likely going to make you a millionaire, which is why I don’t recommend that people purchase bad deals hoping that appreciation bails of them out.

However, appreciation is combined with the other “members” of the wealth generation team, powerful stuff can happen.

3. The loan pay-down

When you purchase a rental property with a mortgage, each month you make a payment to the lender. That payment includes two parts: principal and interest. Interest is the profit for the lender, but the principal is money you are paying down the loan with.

For example, if you purchased a house five years ago for $100,000 and obtained a $80,000 mortgage (we’ll say it was a 30-year mortgage with a 5 percent fixed rate), today you would owe only $74,000. Ten years from now, you would owe only $65,000. This means that every year your equity increased (equity is the difference between what a property is worth and what is owed on it), you’d gain value, as long as the property value didn’t drop.

Of course, if you paid all-cash for a property and didn’t obtain a loan, you would forfeit this wealth generator. This is something only you can decide.

workday-productivity

4. Tax benefits

Finally, the fourth wealth generator in real estate is the tax benefits the U.S. government gives to investors. These benefits are numerous and realized in several distinct parts of the real estate process.

For example:

  • Unlike most businesses, the government doesn’t look at cash flow or appreciation as self-employment income; thus no self-employment tax is typically due.
  • The income tax that is due is often offset entirely by a deduction known as depreciation.
  • Additionally, when you sell rental properties, the profit is taxed at the long-term capital gains rate, if at all.
  • You can often defer any tax using a 1031 exchange offered by the government as a way to trade up into bigger or better properties.

The bottom line: If you make $100,000 per year from your job, your mom earns $100,000 per year from a business she owns and I earn $100,000 per year from real estate, who do you think keeps more? That’s right, I do.

Related: The Ultimate Guide to Real Estate Investment Tax Benefits

Of course, I’m not a CPA, so you should definitely consult with one before making any financial or tax decisions.

Putting it all together: an example

As I mentioned, each of these wealth generators can be powerful in itself. However, putting the four together can make you exceedingly wealthy because of the synergy among them.

For example, you might purchase $1,000,000 worth of multifamily real estate with a $200,000 down payment. Let’s assume this property produced $30,000 per year in cash flow, but it also might be increasing in value at 5 percent per year. This means that after 10 years, it could be worth $1.6 million, and you would have earned another $300,000 in cash flow.

On top of that, after those 10 years, that initial property could be paid down so that you owe only $650,000, giving you $1 million in net worth on that one property alone.

And to top it all off, the tax benefits during that decade would help you keep far more of that profit than had you earned it any other way.

Real estate is not the only way to get rich today, but it certainly is a simple one to understand, thanks to the four wealth generators of real estate.

Now that’s a team I want to be a part of.

https://www.biggerpockets.com/renewsblog/2016/02/10/4-powerful-ways-real-estate-millionaire/


Playing With Power Tools: Taking up Tile in Switchback

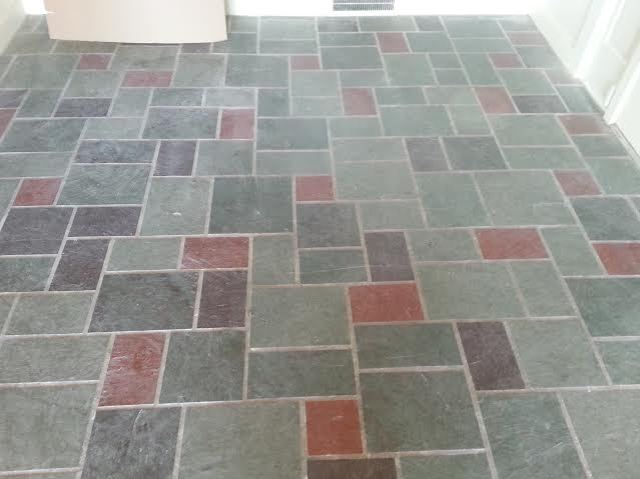
Though we want to keep many original features of the home untouched, there were a few tile floors that needed to go.  In the entryway, the floor was not original but 1960’s slate tile.  While slate is a great product, this tile was not the look we were going for in the house.

48239e62-67b8-4f89-ae95-e4d2fce42817

There was also original tile in the master bath we would have loved to keep if it would have worked with the revamped layout.  It was also damaged in multiple sections so saving it would have been hard anyway.  Luckily the same tiles will be saved in a different bathroom down the hall and the bathroom on the main level also has original tiles.


One of the things we love about this house was that it was built to last.  The original builder poured 2 inches of concrete before setting the bathroom tiles and the entryway was done in a similar manner to match the existing height level of flooring throughout the house.

Of course, when you build something to last that also means it is difficult to get rid of! Dealing with the removal meant using a jackhammer to bust of the tile and concrete.  The process was messy but actually quite fun since it isn’t every day a person gets to use a jackhammer in their house.  The most difficult part was shoveling and removing the heavy debris from the house.  We ended up using the broken up concrete as fill for parts of the hill our house was built on that needed protection from erosion.

After everything was removed and cleaned up, the floor could be prepped and ready to go for new flooring to be installed.  We plan to carry the same floors through the main level and entryway to create flow.  In the bathroom, we have picked out beautiful herringbone marble tile!

0391959d-5c04-4c2f-a7da-f6e4a0d74ee9

Design a site like this with WordPress.com
Get started