“Beam Me Up!”-Installing a Support Beam at Switchback Manor

After getting the basement gutted, we turned our focus above grade to a structural issue.  The previous owner trying to flip the house had removed a wall between the galley kitchen and the family room to open up space.  While it was a great idea in theory, it was a load baring wall and they did a poor job adding the required support.  Instead of using a beam to span the full length of the room, they installed a post halfway through in order to use a smaller (and cheaper) beam.  The beam was also installed improperly to the joists so it was not actually providing full support to the upper level.

PEORIA1157193O

kitchen when we bought the house

78d5fd8c-9ba9-4483-bd5a-3282fbf4d651

everything is gutted and temporary wall construction started

3981d457-ba6f-4a42-b253-576502b5c88d

family room and center post

c5806447-a599-46cc-8d0d-01938e53adbf

old beam removed

In order to correct the problem and get rid of the post cutting the kitchen in half, we bought a 23 foot long laminated beam to span the area.  The beam is actually made of 5 laminate support beams glued and screwed together for extra support.  The beam ended up being over 700lbs!

2df2026b-dfe9-4902-864a-d97b7fb929e7

Beam delivery

167e9795-b9f5-43d5-b1ca-13be055a1440

putting the beam into place

93b5b4ae-6a01-4d99-b574-2c9a206d4c87

Jake checking the beam for strength

We first installed two 2×4 walls to support both sides of the house while we removed  the old support beam and post.  We then rented 2 jacks to lift the beam safely into place.  With Jake on side and my father in law on the other, the beam was slowly jacked up into place and secured to the joists. We then dismantled the 2×4 walls and will reuse them for framing later in the reno.   The end result was a completely open kitchen family room area and a safely support 2nd story.  We are very excited to have a large island between the kitchen and family room to gather and eat while watching movies and football games!

5a391a70-becb-4017-ad4f-c4f41bab3c08

New Beam installed

5a123387-bf3a-449f-8396-c2d77a6d232c

Open kitchen/family room

!

Gutting the Basement at Switchback Manor

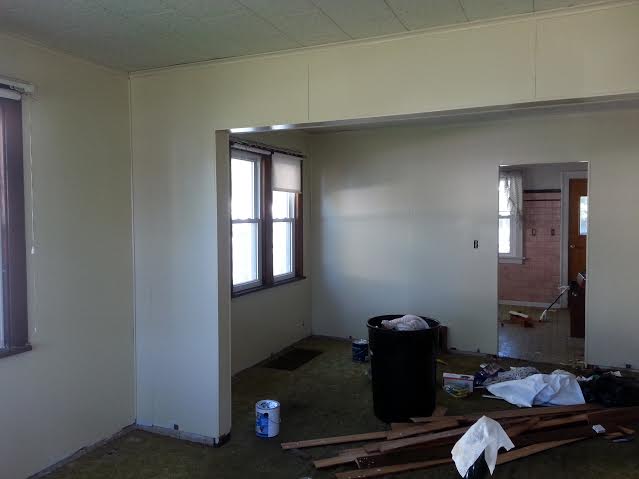
One of the first items of business at the new house was to gut the basement.  The main floor and 2nd story had been gutted for the most part but the basement had been left intact.  Unfortunately, it needed to be ripped apart most of all. We had originally assumed the musty smell was mold and moisture related but soon found out that wasn’t actually a big problem. Instead, while the house sat vacant for a year on the market, plenty of animals took up residence including a raccoon in the ductwork and a colony of mice in the walls and drop ceiling.  All of it was soiled and had to go.
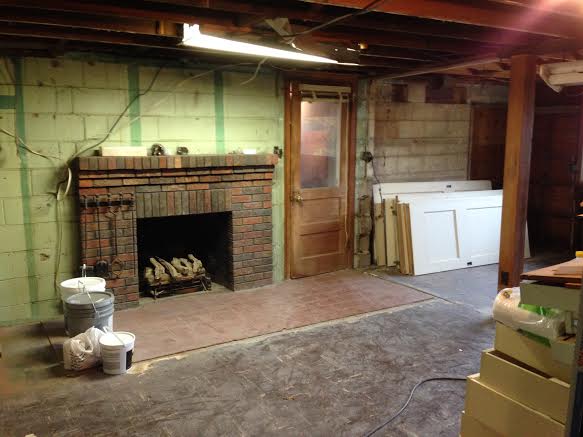
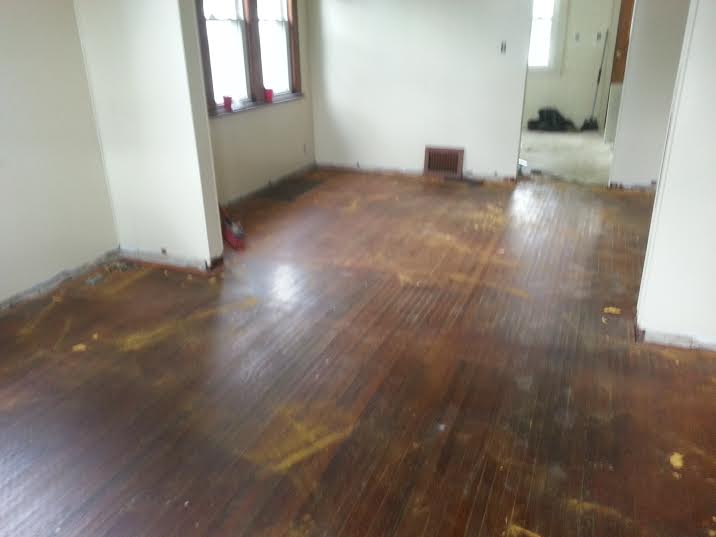
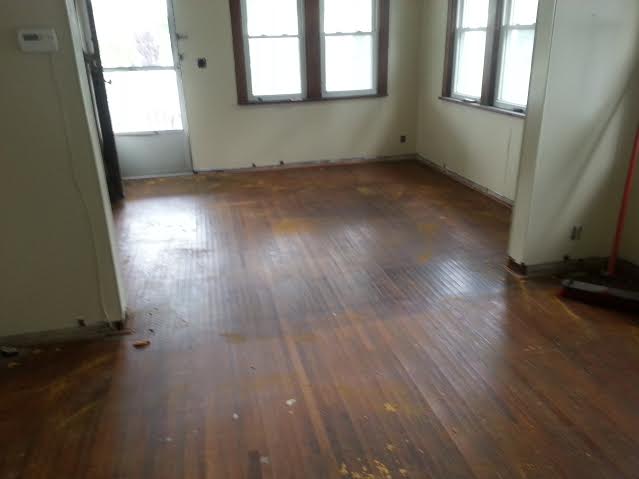
At first, our hope was to keep some of the tongue and groove wood paneling that covered the entire basement and to repurpose it by painting it and installing it sideways for a shiplap look but most of it was not salvageable.  As we went, it became clear we would have to dispose of basically everything in the basement.

We also uncovered old termite damage under the staircase along with plenty of electrical “no-no’s” in the walls and ceiling.  Though we had hoped to save most of the electric system when we started the demo, it was not safe and could have started a fire.  Instead we will spend more but will have brand new wire throughout the basement.

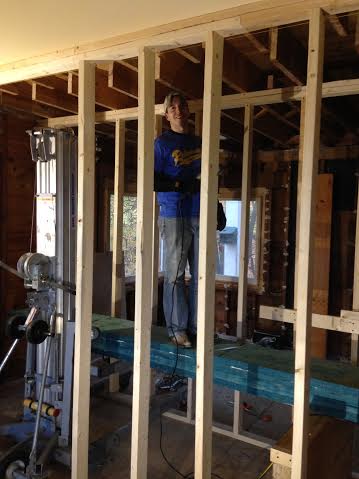
As we ripped out dirty shelving in the workshop, we found foundation cracks that needed to be filled.  What looked like extra supports in the room proved to be loose and weren’t holding any weight at all.  We also made an interesting discovery about an addition that must have been added to the house sometime midcentury.  Though you would never know on the outside, the riverside of the house was built much smaller in 1935 and was later expanded.  The block basement wall was partially torn down and a wood frame wall was built on the walk-out riverside of the property.  Above this is where our dining room will be and includes more balcony space.

b99d4ee8-1c79-464b-9c94-b30e3cff90e8

Even after removing all of the dirty insulation, walls and ceilings, the basement still felt pretty dirty so I spent a weekend scrubbing and hosing down the entire place from floor to ceiling and shopvacing up the water.  This made a huge difference! Without the mouse smell, the basement felt brand new again.

8ddf7381-8b36-4e12-9eb6-2bd87dee2d62

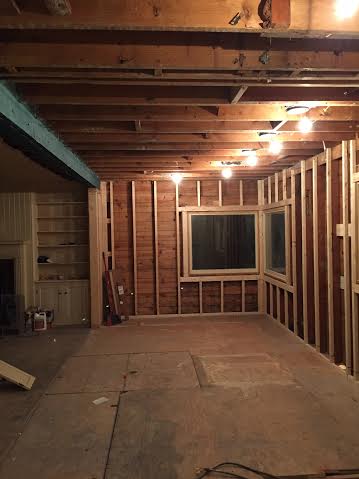
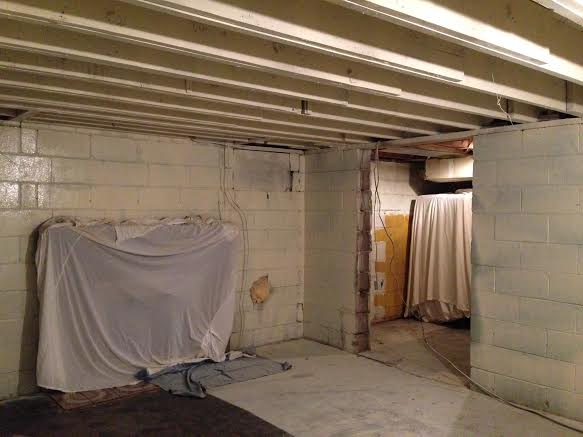
After ripping down all the mouse infested gross ceiling tiles, we made the decision not to cover the basement ceiling again as we are still in the woods and know mice will try to enter the house again at some point.  Instead we decided to keep the joists exposed and paint them cream instead.  The ceilings feel taller and it will add to the industrial feel the basement décor will have.  I used a paint sprayer to quickly paint the wood when it would have taken much longer to do with a roller or paint brush.  The paint we chose is mold and mildew resistant.  Even though we found out there was no moisture problem in the basement afterall, the area is still below grade and will have more humidity than the upper levels.   (Note: Do as I say, not as I do.  I really should have been wearing a mask and other gear while using the paint sprayer.  Instead and I spent an hour in the shower trying to scrub paint out of my hair.  I think I probably smelled like paint fumes for several days!)

c4b17370-a435-4a87-a150-09d360db591a

cc728dce-6a65-49fa-8825-74452c59eeb0

Do as I say, not as I do

1f465abe-ed10-4b0a-9f98-47f510dc7971

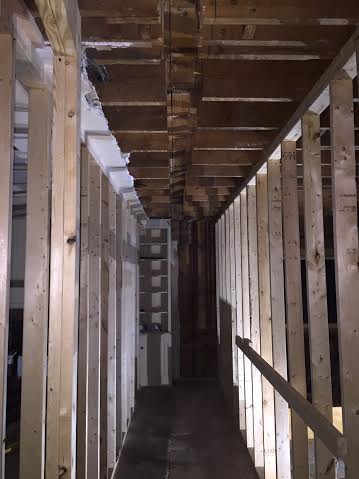
Exposed ceiling joists and floor boards

Overall the basement is much improved even though it has actually been “Un-finished.” There is great potential for another living area and fitness room/4th bedroom in the space.  For a 1930’s basement, it doesn’t feel like a dungeon at all with all of the river-side windows and walkout patio.  With 2 fireplaces and plenty of storage space, we are excited to put it to use in the future.  Still on the agenda:  patching holes, cracks and other openings in the foundation and later finishing the space again!


We Bought a (another) House!

My husband and I have been actively buying a lot of rental properties in the last 3 years.  We are proud to say we have 11 rentals and have rehabbed half of them personally to increase our equity.  We’ve also put in a lot of sweat equity into our personal residence we bought 4 years ago.  Being a realtor and both of us being rehabbers, I guess it was only a matter of time before we fell in love with another house…

Our newest project is 1935 Greek Revival with a beautiful river view.  It’s located on a wooded private drive in Peoria Heights and was built by a J Fletcher Lankton, a well-known local architect.  We learned that he built most of the homes on the private drive and built this property to be a duplex and his office.  Over the years, it was converted to a single family home and survived a scary 70’s renovation.  It was purchased a year ago by someone planning to flip the place for a profit.  They managed to gut half the house before giving up and putting it back up for sale.  We were able to get a good deal on the place as it was sitting vacant for a long time growing mold and attracting forest creatures-Yikes!

After running the numbers, we decided to take a leap of faith and make the house our dream home.  We’ve nicknamed the place Switchback Manor for its (slightly scary) hilly winding drive.  It will be a long project, but in the end our goal is to have a beautiful house with a great chunk of equity built up.  With such unique history, the house has a lot of fun features including 4 safes in the “office” basement and a vintage whole house fan in the walk-up attic.  It has 2 balconies overlooking the river and 5 fireplaces!

I’ll have many posts to come as we dive into this project.  I hope you enjoy taking the journey with us!

Adding Square Footage and Equity: Finishing a Walk-up Attic

Finishing the attic in the “Pink Disaster” rental rehab was no small project but paid off in the form of increased property values and higher rents.  When I bought the house, the attic was completely unfinished and had been used for storage.  It was brutally hot and had no insulation though it did have newer vinyl windows.

PEORIA1163224K PEORIA1163224L PEORIA1163224M

The house was technically a 2 bedroom ranch with a walk-up attic accessed through one of the bedrooms.  By finishing the attic, this bedroom could not technically be called a bedroom anymore and became an office/den.  To make finishing the attic worth it, I wanted to make sure 2 bedrooms could be added upstairs to convert the home into a 3 bedroom plus office space.  Luckily the attic ceilings were very high and the entire space was usable! I designed a layout that included not only 2 bedrooms but also a small sitting area and extra large closets.

The first step was running duct work and electrical up to the space to ensure it was comfortable and functional.  Next came insulation and then drywall.

11949470_10101337412471681_4391771579709132079_n

Once the exterior walls were done, it was time to build interior walls and add closets.  The space really started taking shape with the walls going up.  It looked even better with doors, trim, and paint, but the last piece of puzzle was flooring.

makingbedrooms closets4 attichall2 atticfinish atticbedrm1

We were lucky to pull up old carpet on the main level to find original hardwood in great condition.  I really wanted to carry the same style up to the attic space so I decided to try to finish the original pine tongue and groove floor boards.  With some sanding and 4 coats of water based polyurethane, the floors turned out great.  They are distressed from years of wear which is perfectly on trend right now.  The best part about this flooring choice?  It cost me nothing but a few gallons of poly and the floor sander rental! Pine may be a soft wood, but this wood had been allowed to age and harden in the home for 95 years.  It was also from old growth trees instead of the farmed ones we have today which increases its strength.  This wood will not dent nearly as easily as pine purchased today and even if it does, it will simply add to the character of the floors.

12066051_10101365348547561_4656589122524394120_n

When the project was finished, I ended up adding an extra 500 sq ft of living space to the previously 702 sq ft home.  The rooms were light, bright, and new which attracted a tenant within one day of the home being advertised for rent.

12072727_974262042641458_4944832798954279000_n 12115607_974261119308217_5298029094254649372_n 12118930_974261149308214_4107483206511335120_n

Kate Vandiver- Realtor and Real Estate Investor in Central Illinois

Not So “Pretty in Pink” Bathroom Makeover

The “Pink Disaster” rental rehab project’s bathroom was truly terrible. Not only was it painted pink, but the tub, sink and toilet were all pink as well. It lacked a shower and had awful peeling vinyl floors.

PEORIA1163224I

My first plan of attack was to remove the toilet and replace it with a new WHITE one. This ended up being more complicated than I originally thought as the sub floor was rotted from a slow leak and needed to be replaced. After pulling up the sub floor, it became clear that the old cast iron drain line was also rusted and cracked.

bathroom6 bathroom5

This is common as the cast iron drain is almost 100 years old. It is almost always best when renovating an old home to replace cast iron drain lines with PVC ones rather than waiting for it to fail and cleaning up a leak. PVC is extremely inexpensive and will last for years to come. I had my plumber replace the drain and the sub floor was patched up.

bathroom3

I then set to work refinishing the tub and sink. Both were cast iron models with no rust or scratches. Beware if you do this at home:  open some windows! The tub refinishing kit smells terrible but does what it claims. The tub and sink are now white and neutral.

bathroom2 bathroom4

I used simple peal and stick vinyl tiles for the floors since the bathroom is so small. The tiles are about $1 (some are even less) a square foot and I only needed about 20 to cover the floor. They have a 10 year residential warranty and will hold up well in a rental.

bathrooms

After this, it was time to build the shower wall and run the plumbing for a shower! The old plastic wall tiles were covered with a new shower surround that provided shelf storage. With new paint and new sink legs, the bathroom was ready to go. All in, this bathroom update cost about $400.

bathroom

Kitchen Rehab: Pink and Green and Gross All Over

The plan for the kitchen of the “Pink Disaster” house was fairly simple.  I wanted to save the existing cabinetry but update the room with other features to keep it from looking dated.  I also wanted to remove the existing flooring and refinish the wall tile to get rid of the pink.  Though it had very little storage, the room was actually a decent size so I wanted to bring more storage in as inexpensively as possible. The goal as a rental property was to create a simple, yet attractive space at a low price.

PEORIA1163224E PEORIA1163224F

The kitchen was truly disgusting at first.  Before painting, the walls and cabinets needed to be scrubbed due to years of cooking grease building up on the surfaces.  The cabinets had extremely bad buildup around the pulls that needed to be scraped off.  While this work is gross, the benefits outweigh the costs of buying new cabinets.  The base was built circa 1950 and is very solid construction.

kitchengunk

I then went to work fixing the broken wall tiles.  Luckily (as this home had a single owner since 1950) I was able to find spare tiles tucked in the back of one of the drawers.  There wasn’t a replacement for every piece but it ended up looking much better.

ktichen7tile

It was then time to get a layer of primer on everything.  I decided to try spray paint for both the cabinets and tile as this option offers more lacquer-like options that I thought might stand up to more abuse over time.  I taped off the black tiles and windows which were covered with bags but didn’t worry about overspray on the floors as we would be getting rid of those.

cabinetpaint kitchtile pitinaktich

We then switched out the old pink counter top with a new HD laminate and got a second-hand stainless sink for $20.  The plaster part of the walls were painted a pale beige like the rest of the house.

The floors became the next big job as there were 3 layers of vinyl tile and glue along with 2 layers of paint in some parts!

kitchenflrs3

Removing the glue was labor intensive and involved a lot of flammable chemicals.  There were several times I considered giving up and putting new vinyl back down over the hardwood but I owe it to my husband and father in law for helping and keeping the dream of saving the kitchen hardwood alive!  After all the glue was gone, it was time to sand down the old paint and get to the bare wood again.

kitchenflrs1 kitchenflrs2kitchenflrsktichen flrs

Since the rest of the house had dark wood, we stained the kitchen floors to match.  We ended up going with “Dark Walnut” by Rustoleum.  I put 4 coats of water based polyurethane designed for floors.  The water based version has very little odor compared to the oil based counterpart.

attic13

After the floors were finished.  We added appliances purchased at a second hand appliance store and a few used (but in great shape) cabinets that we scored for $150. I then changed the old cabinet knobs to new, chrome ones.  While the kitchen is not show stopping, it is appropriate for a rental property in this market and only cost about $1000 total.   Half of that total covered the appliances ($530).  With a lot of hard work and a little effort in tracking down used items, its easy to inexpensively pull together a rental property kitchen.

kitchen sink ktichen2 ktihen1

Covering Wood Paneling and Uncovering Wood Floors

The “Pink Disaster” rehab project actually had no pink in the living and dining rooms.  Instead it had 70’s wood paneling covering the old plaster and ancient (and filthy) green shag carpeting covering the floors.  Both needed to go to give the space an updated, clean and fresh look.

PEORIA1163224C PEORIA1163224D

The bedrooms had the original plaster (painted a pale pink) but featured floral carpeting that was just as bad.

PEORIA1163224G

I had a pretty good idea of the condition of the wood floors under the carpet and couldn’t wait to pull it up.  I knew most of the home’s smell was caught in the carpet, but felt the best decision was to paint while the carpets were down and still protecting the wood floors.  We were disappointed to find that the person who installed the paneling had removed the original 1920’s solid wood trim in the living and dining rooms and replaced it with a much cheaper 70’s version. oh well…

In order to paint the paneling, I removed that trim and marked each piece to keep it in good shape.  Before priming the walls, I mopped it with a kitchen de-greaser to remove dirt and oils from the paneling.  The rooms looked much brighter and larger with a lighter color on the walls!

living6 living7

The next step was carpet removal.  Saying this carpet was “dirty” is an understatement.  The carpet was so old and soiled it was literally falling apart as it was being ripped up.  But the wood floors we uncovered underneath made the work worth it.

woodflrs1

Though the wood still needed to be refinished, it was in great shape! None of it needed patching or was buckled.  We set to work cleaning, sanding, re-staining, and adding several layers of water based poly.  After replacing the trim and outlet covers, the main rooms of this house were ready to go.  While refinishing the floors may be the more time-consuming option compared to simply re-carpeting, hard surface floors will hold up better over time as tenants live in the property.  I will not end up having to re-carpet again in 5 years when an untidy tenant moves out.  This will save time in the long run and saves money both now and in the future.  The cost of stain, polyurethane and a sander are far less than the cost of new flooring for 700 sq ft.  After every tenant moves out, I will polish the floors to keep them looking their best for as long as possible until they require an extra layer of polyurethane.

livingrmliving1 bedroom2

Owning Still Better than Renting: Why Owning Your Own Home and Buying Rental Properties is Paying Off

A new article originally published with the Wall Street Journal reports that demand for rental properties will continue to be high for the next 10 years.  This demand leads to high rental prices and can put pressure on tenants.

An estimated 11% more households will pay more than half of their incomes in rent in 2025, according to a new report from Harvard University’s Joint Center for Housing Studies and Enterprise Community Partners, an affordable-housing organization.

The situation could have significant policy implications. Renters who are severely cost-burdened—meaning they pay more than 50% of their incomes in rent—often require federal subsidies to find an affordable place to live. The private sector is struggling to produce profitable housing that is affordable to lower- and moderate-income families, while many federal housing subsidies have been cut in recent years.

In 2013, one in four renters, or 11.2 million households, paid more than half of their incomes in rent. That is three million more households than in 2000.

While this is problematic for those renting, it also means it is a great time to purchase a home for yourself or as a rental property.  Here in central Illinois, it is fairly common to get a mortgage for half the monthly payment it would cost to rent the same property.  That leaves plenty of room to cover extra expenses including property taxes and home insurance.  It also means that now is the best time to purchase affordable rental properties as there is no shortage of tenants looking to rent affordable housing in the Peoria area.  I have witnessed this trend personally with my rental properties.  Vacancies are few and far between as tenants choose to stay in affordable homes for longer periods of time.  Any vacant units I have had in the last year have been rented within one week.

Read the whole article at:  http://www.realtor.com/news/trends/renters-will-continue-to-struggle-for-the-next-decade-harvard-study-says-2/

Post by Kate Vandiver of The Mari Halliday Team 309-369-2114

Goodbye Wood Paneling, Hello Wood Floors

Well, work has commenced at the most recent rental rehab project and we are making progress!  The first thing to happen was cleaning the walls so that I could start painting on a clean surface.  It is amazing how much dirt settles on the walls over the years. I removed and labeled the trim to be replaced later and we then set to work putting a good primer on the wood paneling to help the paint stick.  We chose to paint the walls a pale beige (named yacht beige) instead of white to make the rooms feel cozier.  This also helps conceal imperfections that a stark white paint would accentuate.  Afterward, the rooms looked so much brighter and bigger!

PEORIA1163224C unnamed (1)

As you can see from the pictures, we kept the nasty (40+ year old) carpeting down while painting.  This makes painting much easier and a little bit more fun by not having to worry about drips.  While this was going on, the A/C went out and we ended up having to replace the entire HVAC system, but when rehabbing an old home these kind of repairs should be expected and built into the budget. The good news is that I won’t have to worry about the heating and cooling in this house for another 15+ years.  While they replaced the system, they also ran the duct work up to the attic we plan to finish to add an extra bedroom.  One more thing crossed off the list!

After the painting was finished, we peeled up the carpeting and were overjoyed to find the hardwood flooring in great condition!  The carpet pad was literally disintegrating as we pulled it up which left dust on the floor, but we were happy to see that the 1920’s hardwood was protected for so many years.  After getting the old carpet out, the house feels much cleaner and smells much fresher. I even took a chance and pulled up some vinyl in the kitchen and found hardwood there as well!  Fingers crossed it looks as nice as the rest of the house when I get all of the vinyl up…

wood previewvinyl

Next projects:  Bathroom and kitchen!

Rental Rehab #11: Pink Overload

My husband and I just closed on our 11th rental property yesterday.  We are super excited to have purchased a home in the cute and trendy Peoria Heights area.  The area attracts great tenants and high rents, but our house isn’t quite ready for that yet.  Over the next few months, we will be transforming the place into a very different home:  Painting, adding new kitchen cabinets and flooring, finishing the attic to add bedroom space, refinishing hardwood flooring, and rehabbing the bathroom.   We are in for a lot of work but the end result will be well worth it.  Enjoy some “before” photos!

PEORIA1163224C PEORIA1163224E PEORIA1163224I PEORIA1163224K